There is a proper way of adding a merge field for it to work when creating document templates. If done incorrectly, document templates will either fail to generate or data will not auto populate or at times, you will get error 500.
1. On the Insert Menu in Word Document, click on Quick Parts, then Fields.
2. Select MergeField in the Field names area and enter the name of the field to be displayed then click Ok.
In this example, we are putting the merge field called WorkUndertaken.
Note: The field name needs to be in exactly the same format as listed in the table of available fields. See Document Template Guide in Administration ->Document Templates -> Download Guide for a list of available field names.
3. After adding the merge field, you should see it in a unique format like the one shown below and when you click on it, it should automatically highlight the entire merge field.
Note: Copying and pasting the merge field and changing it to a different name does not work as it only changes the physical component of the merge field but not the actual command associated with it.
Repeat steps 1 and 2 when adding another merge field.
How to Edit Merge Fields in Document Templates
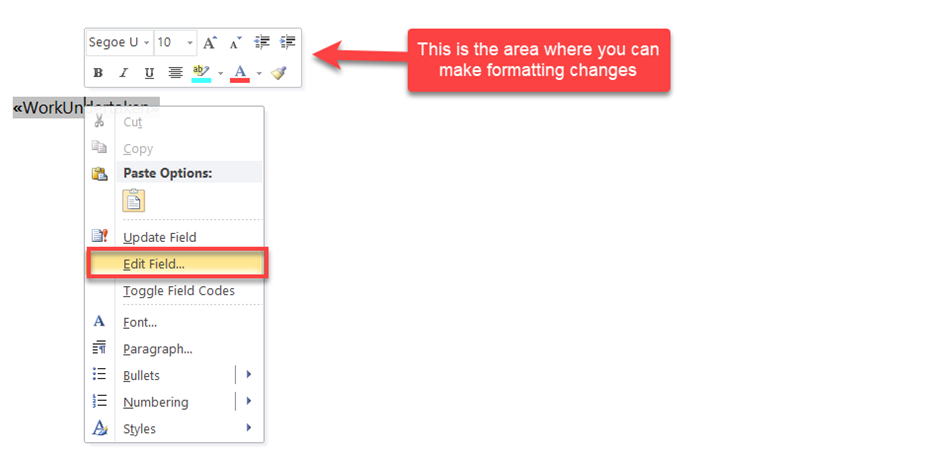
1. You can edit a merge field if it’s not working perhaps due to a typo and to proceed, right click on the merge field and select Edit Field, make the necessary changes for example, spelling and click OK.
You can also apply formatting changes like increase font size, change font style, etc. by doing right click, and adjust accordingly.


