Default Settings in Ascora allows you to set up your default settings for Customers, Supplies, Purchase Orders, Email Notifications, etc..
To set up defaults, go to Administration → Defaults and this covers a few more areas from Location Settings to Scheduler Settings, and important key areas like job default settings, invoice default settings and Supplier Invoice settings.
Contents
- Location Details
- Scheduler
- Customers
- Supplies
- Kits
- Purchase Orders
- Service
- Tasks
- Nav Menu
- Recurring Jobs / Maintenance Jobs Creation
- Retentions
- Inventory & Equipment
- Equipment
- General
- Supplier Invoicing
- Quotes
- Jobs
- Invoices
- Email Notifications
- Timesheet
- Lock Timesheet Dates
Location Details
In Location Details, you can add your country, state, Time Zone, as well as Currency Symbol. This impacts your address searches when creating jobs or quotes.
You also have the option to Show Latitude and Longitude on Site Address by ticking the corresponding box.

Note: If you are using Ascora outside Australia, you can disable the box beside We don't use Country, please hide it and when you go to Administration → Company Details, you will already be able to enter your country name. To learn more about this, please access How to auto populate address search details based on location user guide. |
Scheduler
Under Scheduler, you can set up your default start time and end time for jobs.
Leave Type - is where you can select your default leave type.
Create Labour when confirming times - you can tick this box to enable this setting or untick to disable.

Set Schedule Colours Only By Status - if this is enabled, all your jobs and quotes will be colour coded according to default status colours which is standard across Ascora.
If you disable this setting, you can colour code your jobs and you can do it in Administration → Jobs → Edit → Choose Custom Colour.
Below image shows the default Ascora colours for quote and job statuses in Scheduler area.

Customers
When you create a customer contact, you need to assign a role and it is in this area where you can set a default role.

To create a Customer Contact, go to Customers → access your customer details and click Contacts → New.

Supplies
Under Supplies, you have the option to show or hide unit of measurement, supplier part number, and images.
You can also select your default Write In Category.
Note: To add a Write In, go to Jobs, access one of your jobs → Supplies → and click on + Add Write In.

Kits
You can enable or disable the setting to show images on kit list by ticking or unticking the box.

Purchase Orders
Under Purchase Orders, you can set up your default PO Delivery Location, PO Template, as well as choose on how you want to combine your purchase orders or not combine at all.
It is in this area where you can enable the setting to have an approval for all purchase orders.

To learn more about combining Purchase Orders, please access How to Combine Purchase Orders user guide.
When Purchase Oder Approval Required is enabled, you will see a button called Approve Purchase Order in the Purchase Order screen which needs to be ticked to grant approval.

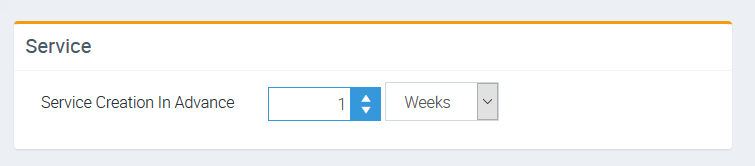
Service
This setting affects automatic job creation for service based ones.
For more information, please see Equipment Overview user guide.
Tasks
Under Tasks, you can select your default Task Filter as well as Default User Task Filter.

Nav Menu
Only Show Client Roster - when you enable this setting, all of the Scheduler Views such as Job Scheduler, Calendar, Job Whiteboard, and Map Scheduler will be hidden except Client Roster.
Show User Tab On Main Menu - you can see Users by going to Administration → Users by default but if you enable this setting, Users tab will become available in the Main tabs area located next to Map.

The following image shows Users tab located beside Map if we enabled the setting Show User Tab On Main Menu.
It also shows Roster instead of Scheduler beside Dashboard and this is how it looks like if we enabled the setting Only Show Client Roster.

Recurring Jobs / Maintenance Jobs Creation
This setting impacts automatic creation of recurring jobs. Once you check the box for Use Customer Recurring Job Creation Settings you will be given the option to set how many days in advance recurring jobs are created.

Tip: To learn more about recurring jobs, please access How to create a Recurring Job user guide.
Retentions
This area allows you to enable Retentions and once enabled, you have a few default settings to configure.
Retentions Held - allows you to set the amount retained on each invoice and also set the maximum retention amount.

Tip: To learn more about Retentions, please access Managing Retentions user guide.
Inventory & Equipment
This is where you can enable Inventory Tracking and once enabled, you will see a few more options such as Stock Adjustments, Stock Transfers, Stock Take, and Stock Reorder when you access Inventory tab.

The following image shows the inventory options after enabling inventory tracking.

Equipment
This is where you can enable Equipment Pass/Fail which impacts how you manage Equipment.

Tip:To learn more about Equipment, please access Equipment Overview user guide.
General
This is where you can change the default page size in Ascora whether you choose to increase or decrease the page view.

Supplier Invoicing
In this area, you have a lot of settings to enable or set as defaults when it comes to Supplier Invoice.
|
Note: This will be automatically adjusted to 'Job' if supplier invoices are being imported as expenses. |

Quotes
This area allows you to set a few default settings for Quotes such as Quote validity and default quote template.
You also have the option to set which information will be copied over when converting a quote to a job. Simply tick or untick the corresponding boxes.
Select the Recipient for Online Quote Acceptance Emails - this setting allows you to specify the email address to receive the automated email once a quote is accepted online. Alternatively, you can tick the box to send the notification to the assigned users.

Jobs
In this area, you can select a few default settings related to Jobs such as Labour Charge Interval in minutes, default Job Type, default Callout, and Team ID.
You could also select your Default Job Pricing Method in this area whether you want it to be always Time And Materials, Fixed Price, Stages, or Sections.
Default Add New To Pre-existing Orders on Supplies on Jobs - you can enable this setting if you want to Add New Supply To Pre-existing Orders.

Invoices
This is the area where you can select your default invoice templates and a few more settings.
Display the following on an invoice header - you can select which information will be shown in your invoice header.

Email Notifications
This area allows you to activate email notifications when a user is assigned an Enquiry, a Qute, a Job, or a Task.
One of the key areas is enabling email notification when a job could not be completed or reattendance is required.
This is where you could also set email notification for expiring licenses.

Timesheet
It is in this area where you set your working day hours and indicate total Ordinary Work Hours and Break Time duration.
Ordinary Work Hours - allows you to enter your typical work hours which affects the calculation or penalty rates.
Break Time - this is where you enter your typical break time duration whether 30 minutes and this impacts timesheet manual entries.
For example, if you have someone doing manual timesheet entry and ticks the box Includes Meal Break then it automatically takes off the meal break duration.
Allow timesheets to overlap - you can select Yes if you allow timesheets to overlap or you can set to No and that gives you a warning message every time a timesheet is created which overlaps another timsheet.


Lock Timesheet Dates
This is where you can set a timesheet lock date which also shows a record of who last modified this setting.

To access a tutorial video about Supplier Invoice Default Settings, you can click the link below:
https://www.ascora.com.au/Portal/TrainingVideos/VideoViewer/Admin-Defaults-SupplierInvoicing
Add Comment